If you’ve never set up your bass before, don’t worry—it’s not as complicated as it seems. A proper setup can make your bass guitar feel smoother, sound better, and just be more fun to play. Here’s a step-by-step guide to get you started.
Step 1: Grab Your Tools
You don’t need much for this. Here’s what you’ll want to have handy:
- A tuner
- Allen wrenches (check what fits your bass)
- A screwdriver
- A ruler or string action gauge (but honestly, even a credit card works in a pinch)
- Wire cutters (if you’re changing strings)
Step 2: Swap Out Those Strings

If your strings are old and dead, you’re not getting the best sound.
- Pick the Right Strings: Want bright tones? Go with roundwounds. After a smoother, vintage vibe? Flatwounds are your friend.
- Change ’Em Carefully: Loosen and remove the old strings, give the fretboard a quick wipe-down, and install the new ones. When winding the strings, keep it neat and tight.
- Also, make sure to apply some pressure to each string at both the nut and the bridge to help ‘settle’ the strings.
Step 3: Tune It Up

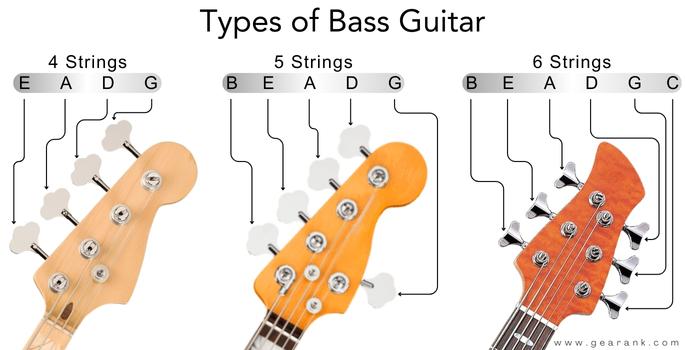
Get your bass in tune before you make any other adjustments. If you’re in standard tuning the notes are as follows:
- 4 strings – E, A, D, G
- 5 strings – B, E, A, D, G
- 6 strings – B, E, A, D, G, C
Use a tuner and make sure everything’s dialed in.
Step 4: Adjust the Neck (Truss Rod)
The truss rod is a little metal rod inside the neck that keeps it straight.
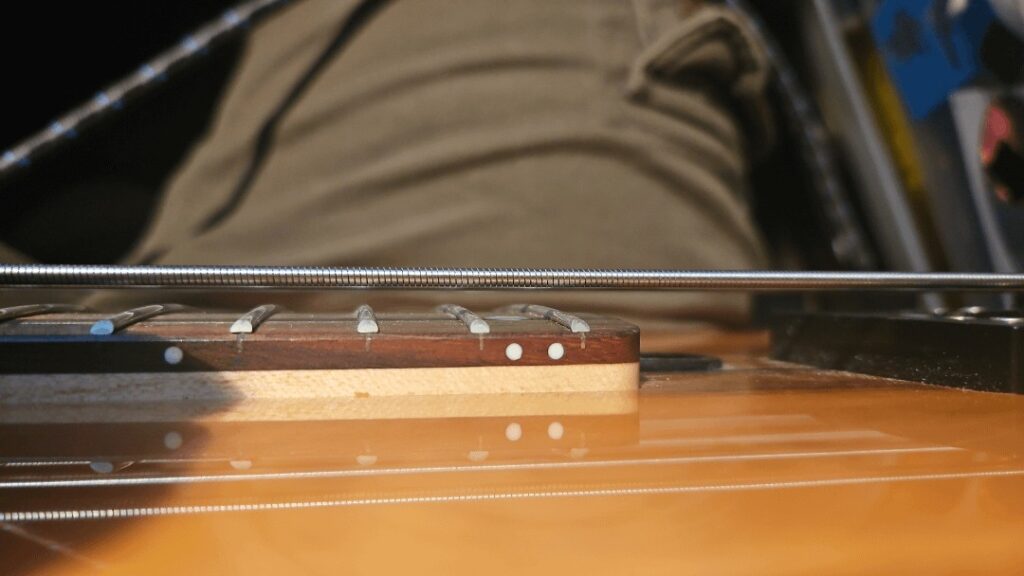
- Check the Bow: Hold down the first and last frets on your E string. Look at the gap between the string and the 8th fret. If it’s too high or low, the neck needs tweaking.
- Make Small Adjustments: Use an Allen wrench to turn the truss rod. Clockwise tightens (straightens the neck), counterclockwise loosens. Go slow—1/8 of a turn at a time—and recheck.
Contrary to popular belief, you don’t need to loosen the strings to adjust the truss rod.
Step 5: Fix the Action

Action is the height of your strings from the fretboard. Too high, and it feels like you’re wrestling your bass. Too low, and you’ll get fret buzz.
- Measure It: At the 12th fret, aim for around 2mm on the E string, slightly less for the G.
- Adjust the Saddles: Grab a screwdriver and raise or lower the saddles on the bridge. Tweak until it feels right.
Step 6: Dial In Your Intonation
This is all about making sure your bass is in tune everywhere on the fretboard.
- Check the 12th Fret: Play the harmonic and then the fretted note at the 12th fret. If they’re not the same, you’ll need to adjust.
- Move the Saddles: If the fretted note is sharp, move the saddle back (away from the neck). If it’s flat, move it forward.
Step 7: Adjust the Pickup Height

Pickup height affects your tone and volume. Too close, and you’ll get weird overtones; too far, and your bass might sound weak.
- Find the Sweet Spot: Press the last fret on each string and measure the gap between the string and the pickup. Around 2–3mm is a good starting point. Use the screws on either side of the pickup to adjust
Step 8: Play Around and Fine-Tune
Once the basic guitar setup is complete, plug in your bass and play. Listen for any fret buzz or uneven tone. Make small adjustments until it feels and sounds perfect.
A Few Extra Tips
- Take your time—there’s no rush.
- If something feels off and you’re not sure how to fix it, don’t hesitate to take your bass to a pro.
- Regular setups will keep your bass in great shape, so don’t be afraid to revisit this process every few months.
And that’s it! A well-set-up bass feels so much better, and you’ll notice the difference immediately. If you have any questions or run into trouble, I highly recommend checking out the fantastic bass guitar setup guide by the amazing team at Fodera Guitars—they’re true experts. While it’s tailored for Fodera users, the guide offers valuable insights that can be helpful no matter what instrument you play


